Search This Blog

Monday, April 28, 2014

Linux - Microsoft Active Directory Integration -- Using Linux Realm Daemon to Authenticate to Active Directory

Introduction

We have looked at several methods of authenticating the Squid Proxy Server application to Active Directory.  Configuring a client workstation to authenticate is much easier using the Realm Daemon.


Keep in mind authentication to Active Directory does not mean integration with it.  You will get a centralized account management system and user and group permissions to network resources.  But authenticating a Linux workstation to Active Directory does not provide Group Policy management -- one of Active Directory's many strengths.  And the applications installed on a Linux Workstation are not often designed to use or automatically pass network authentication, so they typically need to be individually configured.

Install the Realm Daemon, Password Check and Kerberos Client Software

Begin by installing the basic software required for the installation:
#sudo apt-get install realmd cracklib-runtime krb5-user
Enter MYDOMAIN.COM at prompt for the default Kerberos domain during the installation.

Obtain a Kerberos Ticket using the kinit command.  You may specify any Domain User, but in this case we will use the "Administrator" account.

#kinit Administrator
At this point, reboot the machine.

Discover and Join the Active Directory Kerberos Realm

 Two commands accomplish the task of joining the workstation to the Domain as a Computer Account, required for the machine to initiate the communications with Active Directory needed for subsequent User authentication.

#realm discover --verbose mydomain.com
#sudo realm join --client-software=sssd MYDOMAIN.COM
There will be an error due to the /etc/sssd/sssd.conf file.  Correct the error by commenting the incorrect statement:
#nano /etc/sssd/sssd.conf
insert # to comment out the statement:
use_fully_qualified_names = True
and then restart the sssd service.
#sudo service sssd restart


Add Active Directory User Accounts Permitted or Denied Logon

Issue the command:
#sudo realm permit --realm domain.example.com --all
Alternatively you may specify individual accounts permitted to log on or use the "realm deny" command to deny users the ability to log on to the workstation.

Finally, each user will require a home directory to log on to Linux.  The Linux Pluggable Authentication Modules (PAM) specify authentication behavior and can automatically create a home directory for network-authenticated users. Edit the common-session module configuration and add the module mkhomedir:

#nano /etc/pam.d/common-session
Add the line:
session    required   pam_mkhomedir.so skel=/etc/skel/ umask=0022
to the end of the file.  Make sure it comes after the comment statement declaring the end of the sections controlled by the automatic update command pam-auth-update.  Then, create a domain directory under /home.  Domain User home directories will be automatically created here.
#sudo mkdir /home/mydomain.com
Now log out and test authentication.  Check the Domain User's home directory in a file manager window; it will be under the /home/mydomain.com directory.  And then try to issue a sudo command; if the domain user is not added to the sudoers file, the account will not be able to execute elevated-privilege tasks.

The video below deomonstrates the entire process, which takes a five to seven minutes.


Saturday, April 26, 2014

Linux - Microsoft Active Directory Integration -- An Active Directory-Enblaed Linux Web and E-Mail Security Appliance Using IPTables, Apache, Squid and Postfix

Introduction

This article describes a Linux security appliance integrated with Microsoft Active Directory.  The following article links describe the installation and configuration of each component in detail:
  1. Postfix Mail Gateway to Exchange
  2. Apache Reverse Proxy to Exchange Client Access Server
  3. Seamlessly-Authenticated Squid Proxy Server
In addition to the above services, we will also use FWBuilder to configure a host firewall for the Linux appliance.

Linux Firewall Rules


The Linux kernel includes IPTables, which maintains the tables provided by the Linux kernel firewall, the chains and rules it stores.  These may be configured at the command line or using a variety of front-ends.  For this example network, we will use FWBuilder installed on a management workstation.

FWBuilder provides the administrator a wide range of configurable objects, such as hosts, services, protocols, networks, etc.  This example includes definitions of for the Linux security appliance and its services, an Active Directory Domain Controller and its services, private and DMZ networks and the supported web and mail services.  Eleven rules protect the Linux security appliance and private network services:

0 Allow Established IP sessions
1 Allow the Linux Server to communicate with its loopback address 127.0.0.1
2 Allow Connections from the Management Workstation to the Linux Server Management Services ssh and webmin
3 Allow Connections to the Linux Server HTTP, HTTPS, SMTP and SMTPS ports
4 Allow Connections from the Private Network to the Linux Server Squid and Socks ports
5 Allow Any Connections to from the Linux Server HTTP, HTTPS, SMTP, SMTPS
6 Allow Connections from the Linux Server to the Private Network Squid and Socks ports
7 and 8 Allow Connections between the Linux Server and gateway Router DNS ports
9 and 10  Allow Connections to and from the Linux Server and the Domain Controller using a group of Windows Authentication ports
11  Deny and Log all other traffic


Microsoft Firewall Rules

Managing the Windows Firewall is simple.  Do not change anything.  However, if you wish to apply greater host security, you may specify more restrictive settings.


Windows Active Directory DNS

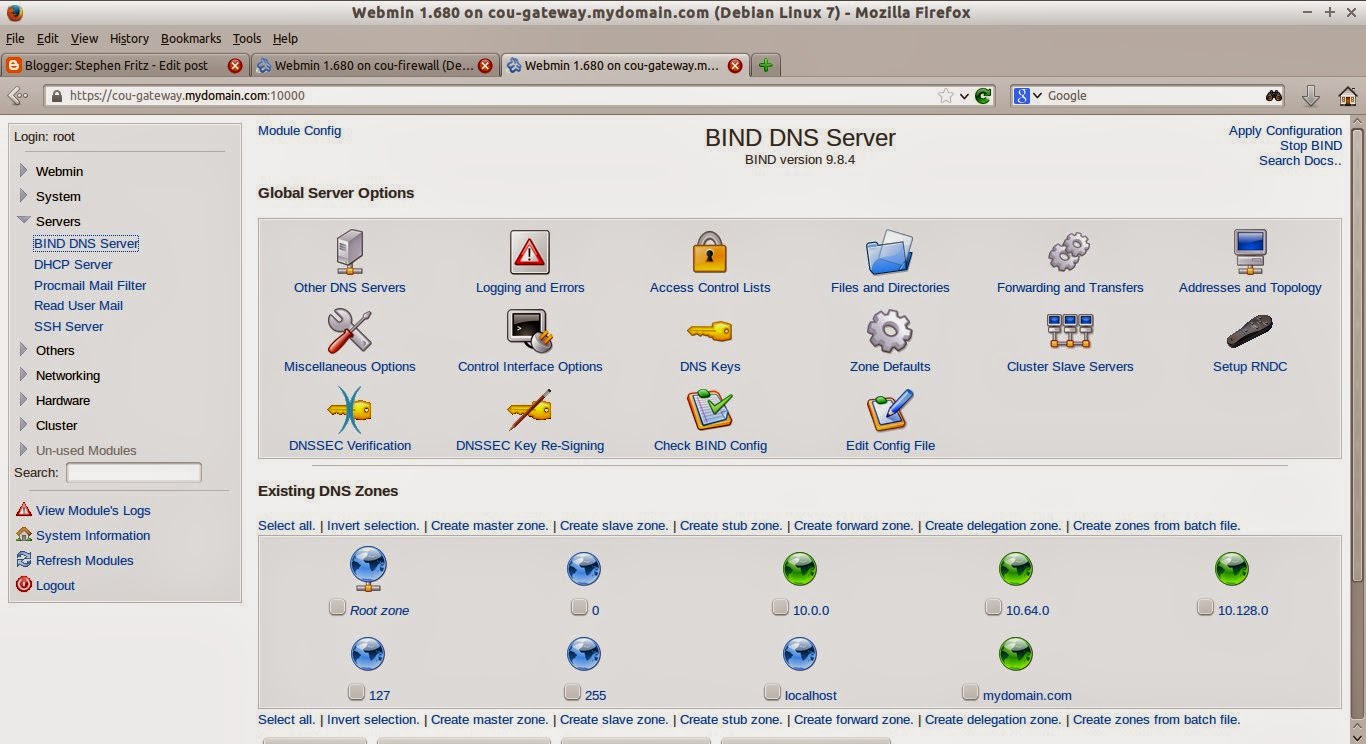
The authoritative Private Network DNS is maintained on Windows Server Domain Controllers.  However, since the Gateway Router in this example network is a Linux Server with BIND9 DNS installed, we will configure slave zones on the Gateway Router configured for transfers from Windows DNS.


The illustration below depicts the hosts configured in Active Directory DNS.  The cou-gateway and webmail records are manually added because these point to hosts that are not members of the Domain.  The cou-gateway record is for the Linux Gateway router and webmbail points to an address on the Linux Security Appliance that provides Apache reverse proxy connections the the Exchange Client Access Server (CAS).


We also configure Microsoft DNS to allow zone transfers and specify the it notify the slave DNS server on the Gateway Router of any changes.

The illustration below depicts the forward and reverse zones (highlighted in green) maintained as slaves on the Gateway Router.  Each zone specifies the IP address of the Windows Domain Controller as the master server.


 The slave zone on the Gateway Router is synchronized with the Domain Controller.


Microsoft Exchange Configuration

The organization has two Microsoft Exchange Servers: exchange01.mydomain.com is the Mailbox Server and exchange02.mydomain.com is the Hub Transport and Client Access Server.

Although not recommended, exchange01.mydomain.com is also the Domain Controller.  In a live network, you should not install exchange on a Domain Controller.  However, since this example network is running as virtual machines with limited memory, Exchange is running on a Domain Controller.


Testing Client Access
The client web browser is manually configured to use a proxy.pac file maintained on the firewall in the web root directory.


The file is simple for this example:


function FindProxyForURL(url, host) {
    // our local URLs from the domains below example.com don't need a proxy:
    if (shExpMatch(host, "*.mydomain.com"))
    {
        return "DIRECT";
    }

    // All other requests go through port 3128 of cou-firewall.mydomain.com.
    // should that fail to respond, go directly to the WWW:
    return "PROXY cou-firewall.mydomain.com:3128; DIRECT";
}
When the browser is opened, it prompts the user for authentication.  As described in the Squid Proxy Server article, this is an Active Directory Domain Account.  had the client been a Windows Operating System that was a member of the Domain, the users logon credentials would have been seamlessly passed to Active Directory over LDAP (or other application-specific protocols as required and supported by Microsoft Servers).


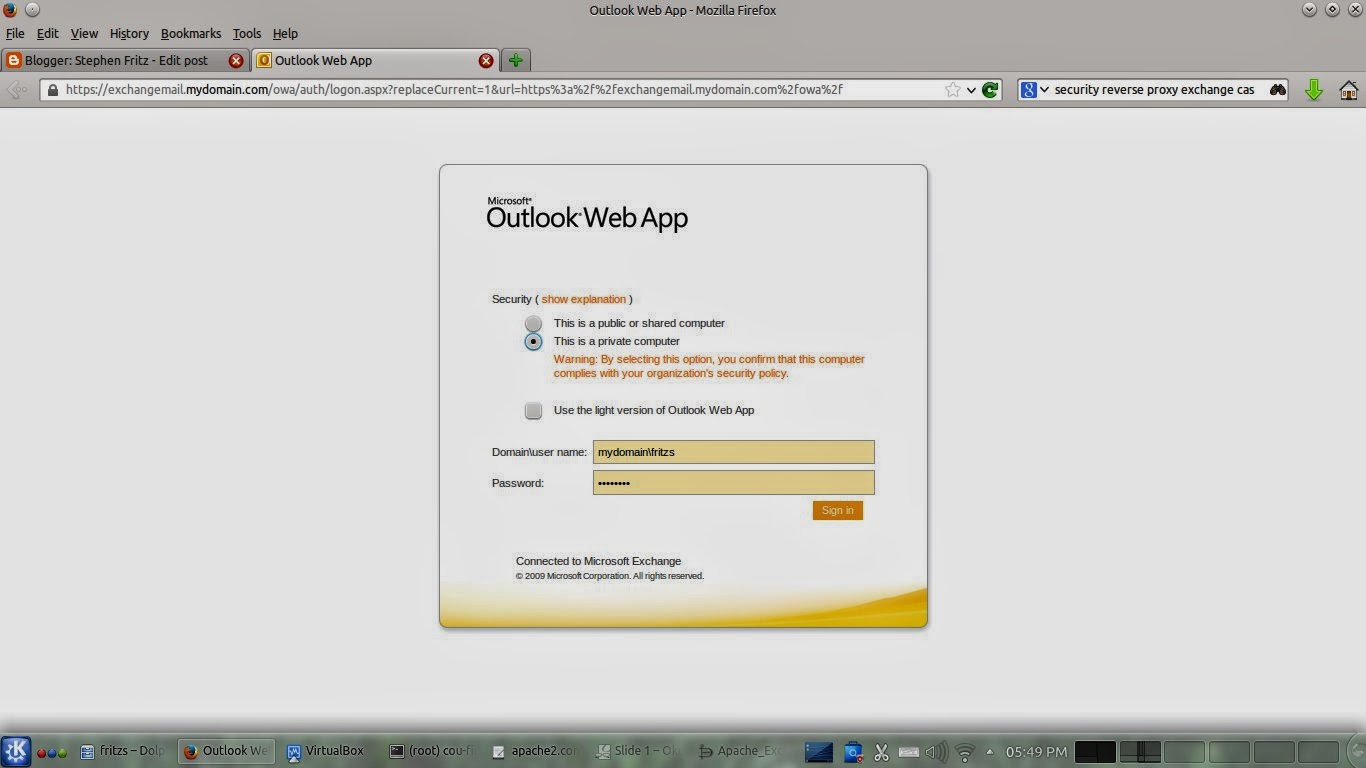
We will connect to the Linux server -- webmail.mydomain.com -- for Outlook Web Access.  The SSL certificate installed on the Linux Apache Reverse Proxy is self-generated, so the user will be warned the certificate can not be verified.  Simply add an exception for the certificate and proceed to the OWA Logon.


OWA will request a domain logon.  Provide the domain\username and password and the authentication will be passed to Active Directory.


Squid Analysis Report Generator

Squid Analysis Report Generator (SARG) is a servicable Squid log analyzer.  It provides information about Sites, Users, Downloads, Denied Accesses (from ACLs) and Authentication Failures.

This information is useful for monitoring and controlling web usage.  Since the web server requires authentication, it also provides verifiable details of specific user activity to support Internet Acceptable Use Policies.  Depending upon your location, this may be very important.  I happen to live in a venue in which there is very strict interpretations of company liability for Hostile Work Environment civil liability.  User-verifiable logging, coupled with an Acceptable Use Policy that requires users to maintain the secrecy of their logon information, will limit liability for unacceptable behavior.


Thursday, April 24, 2014

Linux - Microsoft Active Directory Integration -- Seamlessly-Authenticated Squid Proxy Server

Introduction

Squid is an open source proxy server that may be configured to authenticate to Active Directory.  Microsoft has a variety of Proxy Server offerings such as ISA Server and Threat Management Gateway.  These are fine products that are well-integrated with Active Directory.  Out-of-the box, Squid is not well-integrated, but with a little added software it works very well with Active Directory.

One problem with Squid is it is not well-integrated with Active Directory.  True, you may apply Group Policy settings to configure Microsoft clients to use a Squid Proxy Server, but there are limitations.  One important limitation from a liability standpoint is the ability to keep track of which user is visiting which sites.  Under Active Directory Group Policy client configuration, Squid will record host names of client computers, but not the actual user logged in.  This is a serious drawback if called upon to enforce company Acceptable Use Policies because the actual user is not logged.

Achieving user-specific logging requires an authentication mechanism.  Squid offers a manually-configured authentication option, but this represents an additional administrative burden.  Installing Squid to seamlessly authenticate to Active Directory provides such logging capabilities.  Additionally, security groups may also be incorporated into Access Control Lists.

Proxy servers are primarily security devices; that they provide a disk and memory cache offers some performance advantages, but not to the extent many administrators think.

Source and Copyright

This article draws heavily upon the original here.  The original was published under the Creative Commons Attribution-ShareAlike 3.0 Unported License, and this derivative is also so licensed.

Test Environment

Network
Domain= mydomain.com
Proxy Server Subnet 10.64.0.0/24
Proxy Server
IP = 10.64.0.2
HOSTNAME = cou-firewall.mydomain.com
Kerberos computer name = COU-FIREWALL-K
Windows Server Subnet 10.128.0.0/24

Windows Server 1
IP = 10.128.0.2
HOSTNAME = exchange01.mydomain.com
Windows Server 2
IP = 10.128.0.3
HOSTNAME = exchange02.mydomain.com


Install Kerberos Packages

apt-get install krb5-user libkrb5-3
Note: Just accept the debconf dialog defaults because we are overwriting them.

Setup Kerberos

Back up the kerberos configuration file and overwrite the original with information specific to this installation.
#cp /etc/krb5.conf /etc/krb5.conf.default
#cat /dev/null > /etc/krb5.conf
#nano /etc/krb5.conf
Edit the file replacing the variables with the client's domain and server.
Note: If you only have 1 Domain Controller remove the additional 'kdc' entry from the '[realms]' section, or add any additional Domain Controlers if you have more than two domain controllers.

[libdefaults]
default_realm = MYDOMAIN.COM
dns_lookup_kdc = no
dns_lookup_realm = no
ticket_lifetime = 24h
default_keytab_name = /etc/squid3/PROXY.keytab
; for Windows 2008 with AES
;
default_tgs_enctypes = aes256-cts-hmac-sha1-96 rc4-hmac des-cbc-crc des-cbc-md5
;
default_tkt_enctypes = aes256-cts-hmac-sha1-96 rc4-hmac des-cbc-crc des-cbc-md5
;
permitted_enctypes = aes256-cts-hmac-sha1-96 rc4-hmac des-cbc-crc des-cbc-md5
;
[realms]
MYDOMAIN.COM = {
kdc = exchange01.mydomain.com
kdc = exchange02.mydomain.com
admin_server = exchange01.mydomain.com
default_domain = mydomain.com
}
;
[domain_realm]
.mydomain.com = .MYDOMAIN.COM
mydomain.com = MYDOMAIN.COM

Install Squid3

We install squid now as we need the squid3 directories available. Squid configuration takes places after authentication is configured.
#apt-get install squid3 ldap-utils

Authentication

The Proxy uses 3 methods to authenticate clients:
  1. Negotiate/Kerberos
  2. Negotiate/NTLM and 
  3. basic authentication
Some applications cannot use Kerberos and need to rely on NTLM (notably iTunes). A problem also exists in the order in which the authentication helpers are used, one example is when using IE on a non-domain computer it will fail to negotiate kerberos and will not failover to NTLM or basic authentication, this is regardless of the order in which the helpers are provided. The result is the user will endlessly receive a popup window requesting authentication. A negotiate wrapper (http://sourceforge.net/projects/squidkerbauth/files/negotiate_wrapper/) around the Kerberos and NTLM helpers resolves this issue.

Kerberos

Kerberos utilizes msktutil -- an Active Directory keytab manager. We need to install some packages that msktutil requires.
#apt-get install libsasl2-modules-gssapi-mit libsasl2-modules
To install msktutil on Debian Wheezy, you may either download and compile the source or use the Debian Squeeze package here.

Initiate a kerberos session to the server with administrator permissions to add
objects to AD, update the username where necessary. msktutil will use it to create
our kerberos computer object in Active directory.

#kinit administrator
Password for administrator@MYDOMAIN.COM:
 It should return without errors. You can see if you succesfully obtained a ticket with:  
#klist
Ticket cache: FILE:/tmp/krb5cc_0
Default principal: administrator@MYDOMAIN.COM
Valid starting Expires Service principal
01/09/12 09:01:49 01/09/12 19:01:53 krbtgt/MYDOMAIN.COM@MYDOMAIN.COM
renew until 01/10/12 09:01:49
Now we configure the proxy's kerberos computer account and service principle by
running msktutil (remember to update the highlighted values with yours).
Warning: There are 2 important caveats in regard to the msktutils --computer-name argument.

  1. --computer-name cannot be longer than 15 characters due to netbios name limitations --computer-name must be different from the proxy's hostname so computer
  2. account password updates for NTLM and Kerberos do not conflict.  Thus,this example appends -k to the hostname.
Execute the msktutil command as follows:
#msktutil -c -b "CN=COMPUTERS" -s HTTP/cou-firewall.mydomain.com -k /etc/squid3/PROXY.keytab --computer-name COU-FIREWALL-K --upn HTTP/cou-firewall.mydomain.com --server exchange01.mydomain.com --verbose --enctypes 28
Pay attention to the output of the command to ensure success, because we are using --verbose output you should review it carefully. Set the permissions on the keytab so squid can read it.
#chgrp proxy /etc/squid3/PROXY.keytab
#chmod g+r /etc/squid3/PROXY.keytab
Destroy the administrator credentials used to create the account.
#kdestroy
On the Windows Server reset the Computer Account in AD by right clicking on the COU-FIREWALL-K Computer object and select "Reset Account", then run msktutil as follows to ensure the keytab is updated as expected and that the keytab is being sourced by msktutil from /etc/krb5.conf correctly. This is not completely necessary but is useful to ensure msktutil works as expected.

Then run the following:

#msktutil --auto-update --verbose --computer-name squidproxy-k
Note: Even though the account was added in capital letters, the --auto-update in msktutil requires the --computer-name to be lower case.

If the keytab is not found try adding -k /etc/squid3/PROXY.keytab to the command to
see if it works and then troubleshoot until resolved or users will not be able to
authenticate with Squid.

Add the following to cron so it can automatically updates the computer account in
active directory when it expires (typically 30 days). I pipe it through logger so I
can see any errors in syslog if necessary. As stated msktutil uses the default
/etc/krb5.conf file for its parameters so be aware of that if you decide to make any
changes in it.

The SHELL and PATH variables are there to ensure cron runs properly, change
this if you know what your doing.

#crontab -e
SHELL=/bin/bash
PATH=/usr/local/sbin:/usr/local/bin:/usr/sbin:/usr/bin:/sbin:/bin
#  m    h   dom   mon    dow    command
   00    4    *       *         *         msktutil --auto-update --verbose --computer-name squidproxy-k | logger -t msktutil
Add the following configuration to /etc/default/squid3 so squid knows where to
find the kerberos keytab.

#nano /etc/default/squid3
KRB5_KTNAME=/etc/squid3/PROXY.keytab
export KRB5_KTNAME

NTLM

Install Samba and Winbind

apt-get install samba winbind samba-common-bin
Stop the samba and winbind daemons
service winbind stop && service samba stop
Copy the default smb.conf out of the way and edit the smb.conf
cp /etc/samba/smb.conf /etc/samba/smb.conf.default
cat /dev/null > /etc/samba/smb.conf
nano /etc/samba/smb.conf

local master = no
workgroup = MYDOMAIN
security = ads
realm = MYDOMAIN.COM
winbind uid = 10000-20000
winbind gid = 10000-20000
winbind use default domain = yes
winbind enum users = yes
winbind enum groups = yes
load printers = no
printing = bsd
printcap name = /dev/null
disable spoolss = yes
Now join the proxy to the domain.
#net ads join -U Administrator
Enter Administrator's password:
Using short domain name -- MYDOMAIN
Joined 'COU-FIREWALL' to realm 'mydomain.com'
Start samba and winbind and test acces to the domain
#service samba start && service winbind start
#wbinfo -t
checking the trust secret for domain EXAMPLE via RPC calls succeeded
#wbinfo -a EXAMPLE\\testuser%'password'
plaintext password authentication succeeded
challenge/response password authentication succeeded
Set Permissions so the proxy user account can read /var/run/samba/winbindd_privileged
#gpasswd -a proxy winbindd_priv
append the following to cron to regularly change the computer account password.
#crontab -e
05    4    *    *    *    net rpc changetrustpw -d 1 | logger -t changetrustpw

Basic

In order to use basic authentication by way of LDAP we need to create an account
with which to access Active Directory.  In Active Directory create a user called "Squid Proxy" with the logon name squid@mydomain.com. Ensure the following is true when creating the account

  • User must change password at next logon Unticked
  • User cannot change password Ticked
  • Password never expires Ticked
  • Account is disabled Unticked
Create a password file used by squid for ldap access and secure the file permissions (substitute the word "squidpass" below with your password).
#echo 'squidpass' > /etc/squid3/ldappass.txt
#chmod o-r /etc/squid3/ldappass.txt
#chgrp proxy /etc/squid3/ldappass.txt

Access Groups

Authorisation to use the internet is managed via Security Groups in Active
Directory. By default the squid account will not be able to query the "memberOf" attribute in
AD. Select the top level of your active directory domain in Active Directory Users
and Computers, Right click on it and choose properties, Security Tab, Add the
squid user and give it read permissions (should happen by default) and allow it to
read "This Object and all descendant objects" (Server 2008) by going into Advanced options.
 

Tip: If you do not see the Security Tab on the domain properties window, select
View and tick Advanced features from the AD Users and Computers MMC
Create the following Security Groups and descriptions in AD and add users to the
relevant groups. I suggest adding all your users to Internet Users Standard and
then increasing or decreasing their access level by adding them to additional
groups. The order of access is from least access to highest. So for example, if a
user was a member of Blocked, Standard and Anonymous, Blocked takes priority
and they would have no internet access.

Internet Users Blocked
Description: Members of this group have no internet access
Internet Users Restricted
Description: Members of this group can access the internet allowed sites only
Internet Users Standard
Description: Members of this group can access the internet except for blocked sites
Internet Users Exception
Description: Members of this group can access the internet with exceptions to blocked sites
Internet Users Full
Description: Members of this group have full internet access
Internet Users Anonymous
Description: Members of this group have full internet access and no access is logged
Create the associated files on the proxy. Squid will use these to lookup group membership for users.
#echo 'Internet Users Blocked' > /etc/squid3/blocked_a cess.txt
#echo 'Internet Users Restricted' > /etc/squid3/restricted_access.txt
#echo 'Internet Users Standard' > /etc/squid3/standard_access.txt
#echo 'Internet Users Exception' > /etc/squid3/exception_access.txt
#echo 'Internet Users Full' > /etc/squid3/full_access.txt
#echo 'Internet Users Anonymous' > /etc/squid3/anonymous_access.txt
Note: After making changes to group membership squid needs to be reloaded on the Proxy
#service squid3 reload

Configure Squid

Install negotiate_wrapper
Firstly we need to install negotiate_wrapper. Install the necessary build tools.

apt-get install build-essential linux-headers-$(uname -r)
Then compile and install.
cd /usr/local/src/
wget "http://downloads.sourceforge.net/project/squidkerbauth/negotiate_wrapper/negotiate_wrapper-1.0.1
tar -xvzf negotiate_wrapper-1.0.1.tar.gz
cd negotiate_wrapper-1.0.1/
./configure
make
make install
squid.conf
We then setup squid and it's associated config files.

cp /etc/squid3/squid.conf /etc/squid3/squid.conf.default
cat /dev/null > /etc/squid3/squid.conf
nano /etc/squid3/squid.conf
Note: Update the cache manager variable with the emails address of the person
in charge of the proxy.  Study and update the following text carefully, replacing the example content with your networks configuration - if you get something wrong your proxy will not
work.

## /etc/squid3/squid.conf Configuration File ####

### cache manager
cache_mgr administrator@mydomain.com

### negotiate kerberos and ntlm authentication
auth_param negotiate program /usr/local/bin/negotiate_wrapper -d --ntlm /usr/bi$
auth_param negotiate children 10
auth_param negotiate keep_alive off

### pure ntlm authentication
auth_param ntlm program /usr/bin/ntlm_auth --diagnostics --helper-protocol=squi$
auth_param ntlm children 10
auth_param ntlm keep_alive off

### provide basic authentication via ldap for clients not authenticated via ker$
auth_param basic program /usr/lib/squid3/squid_ldap_auth -R -b "dc=mydomain,dc=$
auth_param basic children 10
auth_param basic realm Internet Proxy
auth_param basic credentialsttl 1 minute

### ldap authorisation
external_acl_type memberof %LOGIN /usr/lib/squid3/squid_ldap_group -R -K -b "dc$

### acl for proxy auth and ldap authorizations
acl auth proxy_auth REQUIRED
# aclname acltype typename activedirectorygroup
acl BlockedAccess external memberof "/etc/squid3/blocked_access.txt"
acl RestrictedAccess external memberof "/etc/squid3/restricted_access.txt"
acl StandardAccess external memberof "/etc/squid3/standard_access.txt"
acl ExceptionAccess external memberof "/etc/squid3/exception_access.txt"
acl FullAccess external memberof "/etc/squid3/full_access.txt"
acl AnonymousAccess external memberof "/etc/squid3/anonymous_access.txt"
acl allowedsites dstdomain "/etc/squid3/allowedsites.txt"
acl blockedsites dstdomain "/etc/squid3/blockedsites.txt"
acl exceptedsites dstdomain "/etc/squid3/exceptedsites.txt"
acl prioritysites dstdomain "/etc/squid3/prioritysites.txt"

### squid defaults
acl manager proto cache_object
acl localhost src 127.0.0.1/32 ::1
acl to_localhost dst 127.0.0.0/8 0.0.0.0/32 ::1
acl SSL_ports port 443
acl Safe_ports port 80 # http
acl Safe_ports port 21 # ftp
acl Safe_ports port 443 # https
acl Safe_ports port 70 # gopher
acl Safe_ports port 210 # wais
acl Safe_ports port 1025-65535 # unregistered ports
acl Safe_ports port 280 # http-mgmt
acl Safe_ports port 488 # gss-http
acl Safe_ports port 591 # filemaker
acl Safe_ports port 777 # multiling http
acl CONNECT method CONNECT
http_access allow manager localhost
http_access deny manager
http_access deny !Safe_ports
http_access deny CONNECT !SSL_ports
http_access allow localhost

### http_access rules
# allow unrestricted access to prioritysites
http_access allow prioritysites
# enforce authentication, order of rules is important for authorization levels
http_access deny !auth
# prevent access to basic auth prompt for BlockedAccess users
http_access deny BlockedAccess all
http_access allow allowedsites
http_access deny RestrictedAccess all
http_access allow AnonymousAccess auth
http_access allow FullAccess auth
http_access allow ExceptionAccess exceptedsites auth
http_access deny blockedsites
http_access allow StandardAccess auth
# DO NOT REMOVE THE FOLLOWING LINE
http_access deny all

### logging
# don't log allowedsites, prioritysites, AnonymousAccess
#access_log /var/log/squid3/access.log squid !allowedsites !prioritysites !Anon$
#log all traffic
access_log /var/log/squid3/access.log squid

### squid Debian defaults
http_port 3128
hierarchy_stoplist cgi-bin ?
coredump_dir /var/spool/squid3
refresh_pattern ^ftp: 1440 20% 10080
refresh_pattern ^gopher: 1440 0% 1440
refresh_pattern -i (/cgi-bin/|\?) 0 0% 0
refresh_pattern . 0 20% 4320
dns_nameservers 10.64.0.1
dns_defnames on
emulate_httpd_log on
log_mime_hdrs on
log_fqdn on
Create the blocked and allowed sites files and some blocked and allowed sites to
them.

touch /etc/squid3/allowedsites.txttouch
touch /etc/squid3/blockedsites.txt
touch /etc/squid3/exceptedsites.txt
touch /etc/squid3/prioritysites.txt
Client configurations are not discussed in this article, but will be in another.  This is a complex topic of itself.

Wednesday, April 23, 2014

Linux - Microsoft Exchange Integration -- Apache Reverse Proxy to Exchange Client Access Server

Exchange 2010 Web Access Architecture

A detailed diagram of the Exchange 2010 architecture is available here.  However, for this article a working knowledge of Microsoft IIS and Apache are assumed.  Exchange uses one or more Client Access Servers (CAS) to allow client Access to information maintained in Mailbox Stores.  The CAS is integrated with Active Directory, IIS and Exchange MAPI (among other protocols) to authenticate and present information to a variety of clients such as Outlook, POP3 / IMAP4 programs and mobile devices.  Access to scheduling information is provided through ActiveSync.

In older versions of Exchange, the Outlook Web Access (OWA) server was simply an IIS server that could be placed in the DMZ for security.  Exchange 2010 CAS servers, being closely integrated with Active Directory, require almost unrestricted access to Domain Controllers and Exchange Message Stores and attempts to restrict access through firewall filtering are likely to break the communications required for a CAS server to operate correctly.  Microsoft suggests using Network Address Translation to direct HTTP/HTTPS traffic to the CAS server that is in the private network, although Microsoft also states that reverse proxy servers may be placed in the DMZ.

Microsoft states that the CAS server (running on Windows Server with the Exchange CAS Role) has been sufficiently hardened that opening it directly to HTTP/HTTPS access is safe.  Perhaps this is true, but Microsoft also has a long history of security issues associated with IIS. Coupled with the requirement that the server is joined to an Active Directory Domain, there are concerns despite Microsoft's assurances to the contrary.

There are several options available, such as a proprietary firewall reverse proxy, IIS reverse proxy (optionally in a load-balanced server farm) and Apache (optionally in a load-balanced server farm).  The Microsoft IIS option does not require joining the web servers to the domain, which enhances security.  However, Apache is an entirely different architecture, which provides even greater security benefits.

The Test Environment


As depicted above, the external interface(s) of the firewall will permit HTTP/HTTPS traffic and Network Address Translate (NAT) it to an interface on a Linux server running Apache Proxy.  Apache is configured to rewrite the requests to the CAS server https://exchange02.mydomain.com directories /owa, /ecp and /Microsoft-Server-ActiveSync.  The CAS server then sues Active Directory to authenticate and access Mail Store and Hub Transport servers.

The Apache Configuration

The following lines configure Apache to reverse proxy requests from the firewall server (cou-firewall.mydomain.com) to the Exchange CAS server (exchange02.mydomain.com).  Under Debian Wheezy, these are placed in the /etc/apache2/sites-available/default file.

<VirtualHost *:80>
ServerName cou-firewall.mydomain.com
ServerAlias exchangemail.mydomain.com
ServerAlias mail.mydomain.com
ServerAdmin webmaster@mydomain.com
ErrorLog /var/log/apache2/error.log
CustomLog /var/log/apache2/access.log combined
Header always set X-Frame-Options SAMEORIGIN
Header set Server Apache
Header unset X-AspNet-Version
Header unset X-OWA-Version
Header unset X-Powered-By
ProxyRequests Off
RewriteEngine On
RewriteCond %{HTTPS} !=on
RewriteRule ^/owa(.*) https://exchange02.mydomain.com/owa$1 [R,L]
RewriteRule ^/ecp(.*) https://exchange02.mydomain.com/ecp$1 [R,L]
RewriteRule ^/Microsoft-Server-ActiveSync(.*) https://exchange02.mydomain.com/Microsoft-Server-ActiveSync
DocumentRoot /var/www
<Directory />
Order deny,allow
Deny from all
</Directory>
<Directory /var/www>
DirectoryIndex index.php index.html
Options -Indexes +FollowSymLinks
Order allow,deny
Allow from all
</Directory>
<Proxy *>
Order deny,allow
Allow from all
</Proxy>
</VirtualHost>
### SSL Host ###
<IfModule mod_ssl.c>
<VirtualHost *:443>
ServerName exchangemail.mydomain.com
ServerAdmin webmaster@mydomain.com
ErrorLog /var/log/apache2/error.log
CustomLog /var/log/apache2/access.log combined
Header always set X-Frame-Options SAMEORIGIN
Header set Server Apache
Header unset X-AspNet-Version
Header unset X-OWA-Version
Header unset X-Powered-By
ProxyRequests Off
ProxyPreserveHost On
SSLProxyEngine On
# owa
ProxyPass /owa https://exchange02.mydomain.com/owa
ProxyPassReverse /owa https://exchange02.mydomain.com/owa
# ecp
ProxyPass /ecp https://exchange02.mydomain.com/ecp
ProxyPassReverse /ecp https://exchange02.mydomain.com/ecp
# Microsoft-Server-ActiveSync
ProxyPass /Microsoft-Server-ActiveSync https://exchange02.mydomain.com/Microsoft-Server-ActiveSync
ProxyPassReverse /Microsoft-Server-ActiveSync https://exchange02.mydomain.com/Microsoft-Server-ActiveSync
DocumentRoot /var/www
<Directory />
Order deny,allow
Deny from all
</Directory>
<Directory /var/www>
DirectoryIndex index.php index.html
Options -Indexes +FollowSymLinks
Order allow,deny
Allow from all
</Directory>
<Proxy *>
SetEnv proxy-nokeepalive 1
SetEnv force-proxy-request-1.0 1
Order deny,allow
Allow from all
</Proxy>
SSLEngine on
SSLCertificateFile /etc/ssl/certs/ssl-cert-snakeoil.pem
SSLCertificateKeyFile /etc/ssl/private/ssl-cert-snakeoil.key
</VirtualHost>
</IfModule>
 

Note that the SSLCertificateFile and SSLCertificateKeyFile use the sss-cert-snakeoil files that are installed by default.  These may be replaced with valid SSL files and referenced as such. 
Reverse Proxy OWA
The SSL Certificate used for this example will not be verified, so the browser will present a warning when the web site is first accessed.  This may safely be accepted.

The browser then presents a familiar prompt to log on by providing "domain\username" and "password,"
After which, access to OWA is granted.